| |
Drafting Plans & Hands-on for Adobe and compressed earth block
Quick description~ A class for owner-builders, designers and those new to Earthen Construction. Taught in a straightforward, descriptive style using drafted drawings, PowerPoint, Hands-on, show-and-tell and lecture. Class takes place at a rustic site in Socorro County, NM. Students work with authentic Adobe/Compressed Earth Block materials and tools, learning standard earth mixes and casting adobes of different types. Joe Garcia with his Adobe Intl. press visits (see schedule below). Students may bring their earth samples to see if they work for pressed earth block or adobe and how to amend them. They learn stabilization recipes to code and how to build rough bucks, walls, corners and arches.
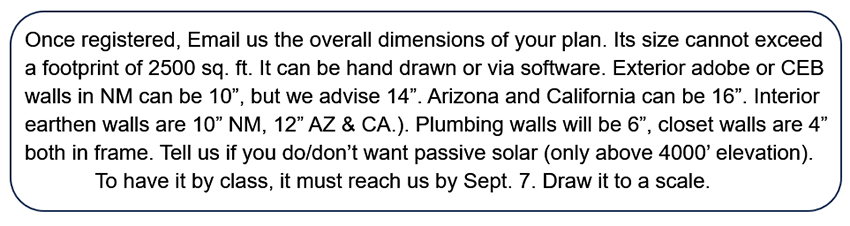
You will need a set of plans to get a permit ~ A common hurdle for the owner-builder or small contractor is drafting (or paying for) a set of working drawings. To save dollars, draft your own or learn enough about what is required to qualify those you might hire. You want drawings that meet code and will determine your materials costs. SWSA will PDF you a set of plans for a 1310 sq. ft. solar-adobe 3 weeks before class*. During class, we will review the plan set and provide hard copy drafting detail handouts. If you don't draft your own, you should at least be able to verify whether that drafts person who wants your job is worth the money. Qualifiers are those who (1) you can work with locally, (2) know how adobe or compressed earth block houses are built, (3) know the earthbuilding code and (4) can show you samples of their drafting that have been permitted.
 Practical Hands-on ~ Practical Hands-on ~
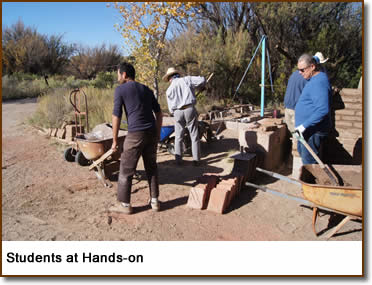
Use your gloves and prepare to heft rustic materials as if on your own project. A task will be defined, as for example, building an arch. The instructor reviews arch instruction and the students participate in building it. Photos are encouraged. Materials will be ready, such as forms, adobes, pressed block, mud mixes, plasters, stabilizers and tools. Students will try screening and blending of earthen materials and use the forms to make adobes. Practice constructions will be to New Mexico code, but with discussion about neighboring State codes. For example, Montezuma County, Colorado doesn't have much of a code. Pima County, Arizona has a fairly tough code. New Mexico has a prescriptive State code that covers all counties. California counties have the toughest codes, requiring an engineer to stamp your plans. All of these codes, while different from city to county to state, must meet the International Building Code (the IBC has replaced the UBC).
Students learn about stacking, cutting and laying block, erecting rough bucks, setting up leads, turning corners, proper overlaps, in-wall reinforcement and setting up electrical circuits and boxes. We provide the basics about your plaster/stucco choices, as well as the standard for stabilized walls that will be exposed.
Local Area and the weather ~
Being in the country means some freedom and avoiding the hassles of Albuquerque traffic. Belén, a small town with motels/restaurants, is 8 miles north. At the country site, the only noise is the occasional Santa Fe train passing by. We will have coffee, cold water & juice, shade, chairs and Portapotties on site. Local directions, maps and facilities info sent when you register. Please note that long motor homes or trailer rigs must park off site. Call 505-861-2287 or email us at adobebuilder@juno.com before class for details. An RV park is located 9 miles south of class at the juncture of U.S. Route 60 and I-25.
Typically, October has warm, sunny days with nights in the 40's. Coffee and cool drinks will provide comfort all three days. Gloves, protective footwear, hat, polarized dark glasses and light jacket advised. Students will be asked to sign a release on Friday morning.
Daily Schedule, class details and Registration
Friday Morning, October 17:
8:00am - 8:30am Coffee and site safety tour. Grab a cup and walk around our immediate teaching area for a quick tour showing you the Hands-on stations and pointing out site hazards. We will start teaching right away, so be ready to take or record notes from the start.
8:30am - 12:30pm (4 hours) (Soils and Adobe/CEB Manufacture to include Site Prep., Learning about soils and Making Blocks. Break as you need to. SWSA will have mud mortar ready for Adobe, as well as a drier soil mix for Compressed Earth Block. Assorted “dry” piles of clay, sand and small aggregates will be on hand for blending or amending a mix. Driving to class? Bring some of your own earth mix and we’ll test it in a hydraulic press or use it to cast adobes. Forms will be ready for standard adobes (10x4x14”, 8x4x16”), larger adobes (14” x 4” x 14”) and the historical 20” x 4” x 10” block used for 32” wide walls in early Santa Fe.
 Check-off list of what we’ll do: Check-off list of what we’ll do:
- Explain what's needed for “site prep” and clearances for materials delivery.
- Show how to lay out foundations and stems based on current code.
- Learn what a qualified earth is for Adobe & Compressed Earth Block and soil types to avoid.
- Look at different screens to prepare rough soils for block making or mortar.
- Learn how many cubic yards of material you will need to make the adobes or CEBs and mortar for your home- the 40% rule.
- Understand different methods of forming and casting Adobes.
- Learn about “inserts” that can change adobe/CEB shapes for different uses, such as channels for electrical circuits or in-wall reinforcements.
- Learn tools that cut or shape Adobe/CEB and casting holes in Adobes during manufacture.
- Explain tests for compression and modulus of rupture for adobe and CEB. Some codes will require a lab report with your plans, showing your block p.s.i. and modulus of rupture. Knowing the field tests can enable you to meet code without too many lab visits (at $75+ per lab test!).
12:30pm- 2:00pm Lunch break- brown bag on site or drive to Belén (10 min. drive).
Friday Afternoon, October 17:
2:00pm - 5:00pm (3 hrs) Laying Adobe or CEB to build a wall and learning to make an adobe or CEB arch. Also, setting speed leads, loading the course and tying into a rough buck. The idea this afternoon is to get you into mixing mortar and laying adobes to the string. At the same time, learn to turn corners, build an arch and finish the wall around the arch.
Check-off list of what we’ll do:
- Go over Speed Leads and how they are made and work. They aren't “off the shelf” and you will need a welder to make up at least four of them.
- Setting and plumbing the leads at the stem corners and stretching the mason's line with line blocks.
- Knowing the thickness of your bed joints before marking your leads. Electrical circuits and/or in-wall reinforcement may play a role, as may the difference twixt CEB and standard adobe.
- Laying mortar on the course using the shovel (yes, trowels are also used).
- Understanding code overlap requirements.
- Placing Adobes or CEBS on the course (sloppy is never good). Use of the adobe spoon to tool.
- Setting dur-o-wal® reinforcement in a course (wall ductility & seismic resistance)
- Ways to tie door/window rough bucks to walls. Demo of three popular methods. Students will make up a rough buck, then plumb and brace it on the stem.
Building an Arch and pulling the form right away
Types of arches explained and their uses. Arches save you money and add appeal.
Check-off list of what we’ll do:
- Set up our arch form on a length of wall. Looking at how it is constructed.
- Use of wedges, centering stick and other tools.
- Building the Roman arch - The tie between a semi-circular arch and a dome is apparent when you swivel the arch form 360º on its center and it becomes a dome. The instructor starts a 36” diameter arch (radius of 18”). Class quickly sees ‘how to’ and will finish the arch. We will pull the form right away. Learn how to properly remove the form.
- Class lays more courses of adobe around the arch, which requires trimming blocks to fit and learning to tool the head and bed joints for strength and appearance.
5:00pm - 5:30pm Site clean up - day’s end.
 Saturday Morning, October 18: Saturday Morning, October 18:
8:00am - 1:00pm (5 hrs) Designing for savings and using adobe’s mass to your benefit. One good method is to ally with the sun. The old axiom, “Sun and Adobe work together” can be applied to any style. Do you have a preferred “style” in mind- such as Santa Fe, Pueblo, Mission Revival, Territorial or Contemporary? Which is the best to blend with your ideas? Which is cheaper? Which wall finishes or floors would I want? What is the “all generation” home?
Check-off list of what we’ll do:
- Teach you the main 3 passive solar techniques. Teach how to determine true south and figure your sun angles. We lay out the basic site considerations. Joe Tibbets goes through PowerPoint slides about rules and requirements for effective heating and cooling, using the sun. Raul Ortega’s presentation of sun angles using Sketch-up software can help you see where the sun will hit different walls at any time of day or year- we'd like to know your latitude and longitude before class, if you have a building site. You are welcome to email it to us.
- Study room layout for best comfort and energy savings.
- Pros and Cons of the various architectural styles & wall finishes for Adobe and CEB.
- Figuring the amount of south glazing you will need in your climate zone.
- What the code says about minimum insulation levels for walls, ceilings and perimeters in your climate zone. Earth wall width choices, such as single, double or double with insulated space.
1:00pm - 2:15pm lunch break - brown bag on site or drive to Belén (10 min. drive).
 Saturday Afternoon, October 18: Saturday Afternoon, October 18:
2:15pm - 5:30pm Topics: Looking at the area of stems, baseboards, floors and convenience outlets. Gain insight into how electrical systems are set up in Adobe and CEB. We will set up electrical circuits on an adobe wall section. We will also form up a bond beam section on a wall.
Check-off list of what we’ll do:
- Figure required stem heights, finish floor levels, door thresholds, ramps and railings.
Explain Floor choices, such as brick on sand, tile or Saltillo tile on slab, flagstone on sand, etched slab and adobe floors. Explain Underfloor radiant systems and Radon prevention. Explain Code requirements for stems and your stem finishing choices. Drawings, slides, show and tell.
- Set up electrical circuits and boxes on one of our class adobe walls. Set up pipe (such as Carlon sch. 40), UF cable and show how to set and position a box. Positioning a box requires knowing if the wall will be plastered or exposed. Learn which things not to run together in the same course.
- Go over bond beam options- what code allows for wood and concrete. Class builds a typical bond beam form with steel requirement in place (good time for photos).
5:30pm : Site clean up- day’s end.
Sunday Morning, October 19:
8:00am - 10:30am (2.5 hrs) Stabilization of adobe and CEB. Go over recipes for preparing Portland based and emulsion based stabilizers. Do’s and don’ts. Mix up stabilized batches and cast or press block.
Check-off list of what we’ll do:
- Mix up a wheelbarrow of emulsion-based stabilized soil and cast some adobes from it. Show difference in texture and viscosity of mud mortar from that used to make blocks.
- Set up a wheelbarrow of Portland-based stabilized soil and cast some adobes from it using hand forms. Also press some adobes from it using the Cinva Ram.
10:30am - 12:30pm (2 hrs) Pressed block machine by Adobe International and demonstrated by Joe Garcia.
12:30pm - 2:00pm lunch break. If you have further questions for Joe, he will go to lunch with those having further interest at a Belén restaurant. Let us know during the morning.
 Sunday Afternoon, October 19: Sunday Afternoon, October 19:
2:00pm - 5:00pm (3 hrs) Review of Fireplaces, wall types, roof types, attachments and energy codes
Check-off list of what we’ll do:
- Explain what code requirements are for stoves and fireplaces and their clearances. A real fireplace will cost you more, but it's worth it if it's efficient. Sadly, this was a lost art until the rediscovery of the Count Rumford firebox, throat, and smoke chamber design which evolved in New England before the Revolution. (we are willing to do a demo fire in our Rumford on site). A good stove costs less and is a great backup choice. But you also need to understand code flue and pipe clearances for both of these choices, for which we will provide hard copy handouts.
- Review all earthen wall types. (single, double, double with air space, double with insulated space). Code tips on presenting your chosen wall system to the Plans Examiner at permitting time, in your drafting.
- Review of attachments between foundations, wall and roof.
- Understand a historic adobe roof vs. two popular contemporary ones. Handouts of roof cross sections. Talk about parapets, gable ends and hip roofs and their respective costs and seismic resistance. If you are fixated by a certain roof type, how will it fit your climate and pocket book?
- Energy code requirements. The jurisdiction you build in will determine your energy code. In a few areas, there is no energy code. But throughout the U.S., most locales do have one. Most follow the IECC (International Energy Conservation Code) from which you can do your calcs. An example is the NM State Energy Code, which recognizes Passive Solar. If a code jurisdiction adopts an energy code that ignores proven technologies, beware.
5:00pm Clean-up and end of class. Students load their test blocks into vehicles before departing (bring a few sheets of cardboard for cushions- your blocks will still be green). At least one instructor will stay on site until 6 pm to answer questions.
Cost: $379 single or $640 for two registering together.
Class capacity: 14 students.
Included materials: Plan set for a small Solaradobe home* and 20+ loose page handouts or drawings. Most handouts 3-hole punched. Additionally, SWSA sends other adobe/CEB PDFs to all registered students before class, which you can print out and save in your field notebook.
*The Plan set will be sent to you as a series of PDFs 3 weeks before class. Print out the plan at your local repro shop. They will be on, 24” x 36” sheets. Check your local prices. Our average cost per sheet at Academy Reproductions in Albuquerque is $2.50 per 24” x 36” sheet. (You will not need the plan set at class).
|
|